B1BG0TK1 - 206 DW8 ENGINE
REMOVAL - REFITTING POWER UNIT
1 - SPECIAL TOOLS
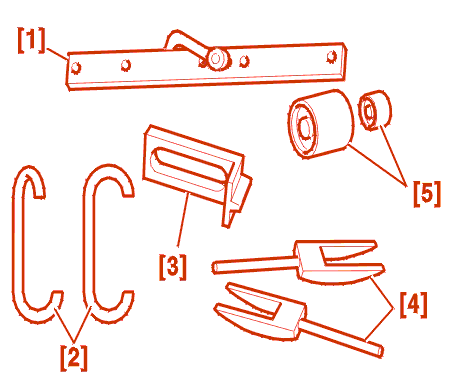
[1] Cross beam, Reference (-).0102-D .
[2] Lifting hooks, Reference (-).0102-J .
[3] Flywheel stop, Reference (-).0188-F .
[4] Forks for removing gearbox control rods, Reference (-).0102-G1 , (-).0102-G2 .
[5] Final drive output oil seal fitting drifts, Reference - (-).0317-T , 0317-U .
[6] Bonnet stay, Reference (-).0347-C .
2 - REMOVAL
The power unit is removed from above .
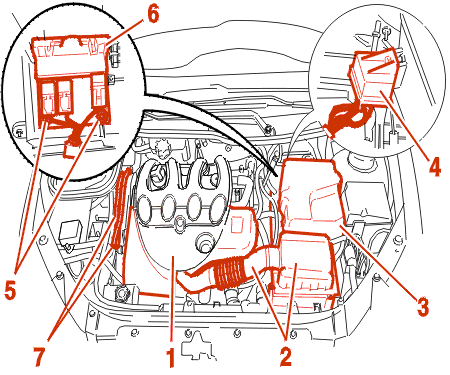
Place the bonnet in the vertical position Using the tool [6] .
Remove :
Disconnect and move aside :

Disconnect :
Disconnect and move aside :
Remove the hose (13) .
Remove the front wheels .
Drain :
Remove :

Disconnect the connector (14), Front left wing inner panel .
POWER STEERING

Unclamp and move aside the power steering pipes attached to the engine (15) .
ALL MODELS
Remove the closing plate (16) .
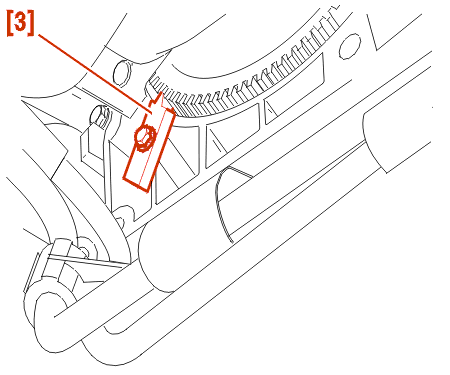
Fit the tool [3] .
Uncouple the front exhaust pipe (Manifold side) .

Remove the torque reaction link (17) .
AIR CONDITIONING
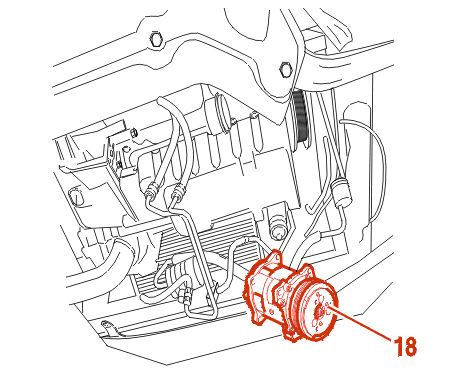
Without opening the refrigerant fluid circuit, move aside the refrigeration compressor (18) .
WARNING : take care not to bend the refrigerant pipes (risk of damage) .
ALL MODELS
Remove : The front panel .
POWER STEERING
Move aside the power steering pump without opening the circuit .
ALL MODELS
Disconnect and move aside :

Move aside the expansion chamber (19) and its unions .
Move aside :
Move aside : Clutch cable .
RIGHT HAND DRIVE

Move aside the clutch slave cylinder (20) without opening the circuit .
ALL MODELS
Uncouple the gearbox control rods (Using the tool [4]) .
AIR CONDITIONING
Protect the condensor using stiff cardboard .
ALL MODELS
Remove :

Position the cross beam [1] with its hooks [2] on the sling eyes (21) and (22) then place it under tension .
Remove :
Disconnect, unclip and separate the harnesses, pipes and cables connected to the gearbox or engine .

Retrieve the spacer (30) .
3 - REFITTING
Proceed in the reverse order to removal .
Always renew :
IMPERATIVE : fill the space between the oil seal lips with grease .
Position the spacer (30) on the gearbox shaft then coat it with PCAS SPAGRAH grease .
AIR CONDITIONING

Refit the compressor in the order of assembly shown above .
WARNING : the anti-rotation nut (31) secures the compressor at its upper rear end .
Firstly tighten the bolts on the crankshaft pulley side to 4.2 da.Nm then the bolts on the oil filter side to 3.9 da.Nm .
ALL MODELS
4 - TIGHTENING TORQUES

(23) Right engine mounting fastener : 4.5 da.Nm .
(24) Right-hand engine mounting fastener to flexible mounting : 4.5 da.Nm .
(32) Fastener for flexible mounting : 4 da.Nm .

(26) Gearbox mounting fixing to left side flexible block : 6.5 da.Nm .
(33) The shaft : 5 da.Nm .
(27) Flexible mounting to bracket fastening : 6 da.Nm .
(34) Flexible mount bracket to body : 2.7 da.Nm .

(35) Torque reaction rod fastener : 5 da.Nm .
(36) Rod to torque reaction link flexible mounting fastener : 3.5 da.Nm .
(37) Torque reaction link flexible mounting fastener : 4.5 da.Nm .
5 - REFITTING (CONTINUED)
Strictly follow the fastening and routes of the various harnesses and pipes .
Top up the gearbox oil .
FILL AND BLEED THE COOLING SYSTEM .
Initialise the various ECUs .