Hi Everyone
Thought I would share where I'm up to with my project and as it's an ongoing one (aren't they all), then I'm always open for some input and opinions, performance wise I'm almost there and basically know what I'm doing, all parts are purchased and engine fitted, then stripped again and the block currently resides at Pug1off where it's getting the crank dynamically balanced.
Maybe I should start at the beginning, what this project will show is don't always listen to those who say "you can't do that" it's probably my biggest pet hate, believe me, if you have the time, patience, resources and an understanding partner, then you can achieve anything with your car.
So let's put one Myth to one side, YES you can put a 206 RC 180 engine into a 206cc, anyone who tells you differently is plain wrong, why? Because I did it and very easily, the 2.0 138hp CC models engine, is basically just a 180 block, yep the head (internally) is different, but footprint wise, they are the same. Just wanted to get that one out there before I started lol as I was told before I started the project by so called "Pug experts" on some public forums, that it could not be done.
Right mid 2016 I bought a silver 2005 2.0 16v 206cc with 44,000 genuine miles on the clock for my better half, unfortunately after chasing numerous insurance companies, it was going to be a fortune to insure her, as she was still learning to drive. So I decided to keep the car for myself and start a project, swear she still bears a grudge about it lol.
So what was my end goal? Well as a previous owner of everything from Cosworths to a skyline, I've always loved big power, basically being pinned into your seat under acceleration, I've never grown out of it, from having my first RS Turbo at 23, to a Skyline at 40 and a stack of motors in between, something has always been the same, I've always modified them and they have always had big power. So yeah my Goal for the car........ 500BHP, now there's quite a few out there will be going "impossible" nope not at all, just Bloody Expensive and one massive amount of work. This was never going to be a engine change, stick on an air filter and exhaust, remap and drive off happy with around 200-220hp, it was always going to be a bulletproof project, that's everything from Brakes, Suspension, Engine, Chassis, ECU, but also making it have the capability to be revved to 8k and not have bolts shake off, or eventually blow the engine apart.
So I started to getting myself a 180 RC head, that got flowed and ported professionally and the head had only done 7k before I bought it, so was in very good condition, all the engine work by the way has been done on an engine stand, the car remained running around with the 138HP engine, that had been tweaked to put out around 170. There was only going to be one way to go, if I wanted to reach anywhere near 500hp and that was the "Forced Induction" route, so it was going to be either Supercharger or Turbocharger, I went the turbo route, simply because it's something I know a lot more about, so felt less nervous about being willing to throw Thousands upon Thousands of quid at a less than £1,000 car.
So while the head was away I got myself a exhaust manifold made with a T3 turbo fitting, to come up where the battery was, this was my first obstacle "space", so the battery would have to be removed to the boot, that created its own problems, as you only have around 280mm if I remember rightly, from the boot floor to the safety net, warning you of the max height of having anything in the boot. I also wanted to put all the fuelling set up in the boot, but that then meant, the battery needs to go inside a fire proof box, as I'm told Electricity and Fuel don't like each other lol.
*****Thats My lot for the night as it's 3:14am, will continue with this tomorrow, hopefully it will be of interest to someone haha*****
Apologies for not updating this the next day as I said I would, so rather than just continue in what I was writing, I will try to answer any questions that come up in the replies first.
1/ Suspension Arms/Bushes - The arms themselves are from the 180 and I have powerflex poly bushes fitted all round (expensive but worth it). Going to write a bit in the post about the suspension further on anyway, that will hopefully answer any questions.
2/ Gearbox - At the moment in time I've two Gearboxes, a 180 one that's standard and has held together up until now, as I'm not finished with the project and it's running very low boost. The second box is another 180 BE4 that is being upgraded with uprated gearing and an LSD (as money becomes available).
3/ Battery Position - As the car will be taking part in shows when it's eventually finished, the boot is the most tidy place for it, plus it's already there lol, cabling wasn't a problem as whole interior was taken out and Fuel/Power cables/pipework was ran then (more on that as I go on)
4/ Electrics - This as you say is where most people fall short, your right you can get any engine into any car really, but there's a thousand sensors to think about and an ECU to wire up, luckily from 2004/5 the 206 was multiplex, so the tails were there anyway for all relevant sensors, plus I run a bespoke made standalone ECU that has been professionally wired in (once again more on this later).
Ok back to the project
-------------------------
Fuelling
Right so after the battery was placed in the boot in a fireproof box, I actually caught a break here, but not something I would suggest anyone else does without making the relevant adjustments to the boot. There is a box shaped area directly below the boot area, it's actually a structure made to reinforce the chassis, it's deep enough to hold a battery but needs welding up as has holes in each bottom corner, it also has two rubber grommets at either side of it, so and IF YOU ADD REINFORCEMENTS TO THE CHASSIS, you can cut a section out, place Battery inside and run cabling out of a new grommet, ensuring that the wiring is encased in a waterproof sheathing, you also need to make sure that the box is breathable so it isn't air tight. I had an access panel put in, on hinges so it can be changed if needs be by opening via a lock mechanism, this is accessible through the boot floor.
I bought a racing battery, that was slightly smaller but more powerful, the boot floor, sides & boot lid then had 3mm fireproofing put down underneath 2mm checkerplate. Basically the entire boot was encased in stainless checkerplate, this is mostly cosmetic, but also provided a small firewall as the fuelling set up was being put in there. Fuelling setup is totally personal taste, but as long as you keep to the following formula you can't go wrong.
TYPICAL FUEL SETUP
Mine consisted of a low pressure Fuel Filter connected to a Facet low pressure lift pump pulling out of the tank, leading into a swirl pot, then two Sytec High Pressure Filters into two Bosch 044 pulling out of the swirl pot, then an adjustable pressure valve with gauge so I had control both at the feed end and in the engine bay with the second adjustable valve connected to the fuel rail. I also have two manual fuel cut of valves, one in the boot and the other placed down beside the drivers seat, placed inside a small plastic box I made, this gave me the option to cut off fuel supply within seconds in case anything went wrong, I also have two electric cut off switches, one in the boot and another on the dashboard. All pipework is 16mm stainless braided with AN-10 fittings. Also and it's an important one, if your going to remove or mess about with the original Fuel Tank, you still need a breather pipe put on there, which should be fixed at the lowest point of gravity from the top of the tank. AN6 fittings (10mm) and pipework are normally sufficient but as the project was always designed to be upgraded I needed the capacity for extra flow, so I could work within larger parameters and make sure it never suffered from knock, due to a lack of fuel, I also used 3 fuel pick ups inside the tank from a Ford Mustang NASCAR, these are 4" wide and the 3 are inline going into 1 uptake tube, which obviously then goes to your low pressure filter and Lift Pump.
Suspension
This is a VERY important one, people tend to overlook this part, sticking a set of coilovers wont just do it, if your going to be running huge horsepower then your going to suffer (As mentioned by another member) from Torque Steer, don't underestimate how severe it can be, it WILL jump across lanes under maximum boost without the adequate changes to your chassis and suspension, the car already spins in 3rd at 70mph in the dry, just drop down from 4th, plant your foot down and as there is virtually no lag, it just lights up the tires. With all the changes I've made I still get torque steer, so still fight to keep it in a straight line, especially through lower gears under acceleration. Right first thing to change is to put coilovers on, this a personal choice, for me they look neater and if adjustable are the way to go in my eyes, then came changing everything to do with the suspension for NEW QUALITY PARTS, That means arms, drop links, the full works, I also changed all of the bushes for POWERFLEX, once again there are other makes out there, but you really do pay for what you get, the coilovers meant I could drop the front by around 30mm, I didn't need to go lower for two reasons, first I'd fitted a set of 17" GTI alloys which brings its own problems, as you will have to run a minimum profile of 40's and use 10mm spacers to avoid catching the tyres on full lock, that's back and front.
The rear axle was changed for a 180 refurbed one, as it's a torsion bar design, the coilovers you put on the back make no difference to ride height, that's done by altering a setting on the axle itself and it's an axle out job, for £170 exchange, it was easier to order a refurbed one from a reputable company who can drop the ride height in factory, so it comes already dropped to your desired ride height, I got it £30 cheaper, as I already had my own bushes to put in, I also had it dropped 40mm as the rear always tends to ride higher as standard, 40mm levels the car out nicely. So I now had POWERFLEX bushes all round the car, as well as coilovers front and back. But it doesn't stop there, you now have to strengthen the chassis, I turned to ULTRA-RACING for a complete set, that's front, middle and back underneath the car, it may seem an added expense, but it's a case of "Big Power" costs "Big Money" to do safely and correctly, also the difference is amazing an immediately noticeable, normally I would have also put them inside the car, but that problem was overcome a different way, via a Roll Cage. I will let that image settle in your mind for a moment as it's something most Cabriolet owners never think about or think isn't possible. So let's just say it as it is, if you flip the car, the factory standard measures taken WONT save you, they may do on a simple once over onto the roof, but if it's in a 170 mph ++ car, then during a multiple roll, your basically dead. So I used a great guy called Rob (Details on request if you need any roll cage work doing, he really knows his stuff and is very reasonable). Rob built me a Cage that used two Horizontal bars, one right on the bottom of the floor and another Belt Bar (for my 5 point Harnesses) which is also side to side, so they act as stregtheners and really hold the car together, stiffening it up no end, the cage then comes forward and into door bars in an X formation, so you have a little step over when getting into the car, we then have a Front bar that runs behind the dashboard which fixes onto the door bars, added to this there are two strengtheners, often called Fender Bars, that attach at the two door hinges and run forward and connect via bolt & weld in my case to your front struts, there is also bars running up each side of the front window and across the width of the car, basically a whole racing rollcage. Does it take a little away from the experience of a soft top? Yes I suppose it does, it does look slightly strange at first, but it's personal preference and most could & can get away with a rear cage, that would be behind your front seats, so it would interfere with your view. So apart from the added weight as a slight downside, but the gains from the strengthening and subsequent handling of the car was well worth it, the car is solid with zero body flex. That's not the end of suspension changes, you also need to look at the engine bay, I suppose this part could be under a different heading, but if your trying to eliminate body flex and some Torque Steer, then there are 3 parts to replace, top, bottom and gearbox engine mounts, now for me there are only ONE company to go to, as there product is amazing and that's VIBRA-TECHNICS, your talking about around £250 +/- for a full set, but they do the job amazingly. So that was the suspension sorted, now for the brakes.
BRAKING SYSTEM
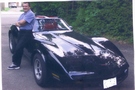
Project CC Beast
Project CC Beast
You do not have the required permissions to view the files attached to this post.
Last edited by Blofeld on Sun Jun 18, 2017 9:18 am, edited 4 times in total.
Daily Drive: Astra Elite 200
The Missus: Gone
Current Project 1: 206RC 480hp dropping to 350hp, Rebuild with custom Box & Shafts, original HP twisted chassis, blew 7 lsd boxes and snapped dozen’s of hardened driveshaft’s, plus impossible to get it to hook. Main problem atm ££’s)
Other Long term Project: Ford MK2 RS2000 Custom (Nut & Bolt Rebuild)
Re: Project CC Beast
This sounds like an interesting project. I've done some of this myself in the past, and underbonnet batteries have always needed relocation, for which I found the passenger footwell to be the best place. Shorter cabling and mass being nearer the centre of the vehicle being the main advantages (you can also keep an eye on it in case it starts bubbling etc). No need to worry about passenger discomfort, as I found their aren't too many volunteers for this role. 
Re: Project CC Beast
I take my hat off to you.
While I have never said some thing can't be done, I have pointed out the pitfalls (which are mostly electronic/ecu related)
I know some people have fitted the V6 into the 206 platform so anything is possible.
The problems I come across are with people who don't understand the interelation of the electronics- Yes you can bolt any engine in, but it's getting it to work afterwards is the issue.
Please keep us updated as you go. BTW what gearbox are you using?
Cheers Col.
206cc 1.6ltr (Wifes toy)
Mercedes ML (workhorse)
Corvette C3 (my toy)
When requesting help of a technical nature, please give as much detail of the fault as possible along with details of exact model, engine size & type, gearbox, year, mileage, and any relevant work carried out to try to solve the problem to help us help you.
Better still, put the details in your signature.

Re: Project CC Beast
Make sure your front suspension is up to spec .. 138hp makes torque-steer a problem if those suspension arm rubbers are split, cracking or even the wrong type ..
People try to save money (or they are fitted by the garage and charged for the better ones!) by fitting the cheaper arms which are far too soft for the big 2.0 lump. They don't last long. Get the GTi ones or even consider fitting poly bushes or you will find you could be in the wrong lane when you hit the loud pedal!
If you haven't been there, also have a look at 206info.co.uk where the 180 engine is more common and where there is a lot of tuning happening!
Good luck with this and as Capncol says, keep us updated. Our CC is now a memory but I still lokk in from time-to-time. You can never forget a Cayman Green CC .. the seat pattern burns a ghost image into your retinas!!
Family Fleet: ex-Cayman Green 206 CC 2.0 LE, Indigo Blue 206 1.4 HDi Hatchback, Subaru BRZ Auto, Alfa Romeo MiTo
Re: Project CC Beast
very interesting read and i look forward to more progress.
I always thought a 180 engine swap would be quite simple since the cc came in 2.0l form anyway, suppuse it depends on different [peoples idea of 'simple' tho
I always thought a 180 engine swap would be quite simple since the cc came in 2.0l form anyway, suppuse it depends on different [peoples idea of 'simple' tho